How to modify Minecraft the easy way with TypeScript
Mod Minecraft with TypeScript
Usually, modifying Minecraft requires coding in Java, and a lot of scaffolding. Now you can write and share Minecraft mods using TypeScript/Javascript.
ScriptCraft is an open source JavaScript Minecraft modding library, and we’ve written support for TypeScript, and a bunch of tooling to create a familiar developer experience for those coming from JavaScript land (including Yeoman and NPM).
In this article I’ll walk you through getting set up and building your first TypeScript Minecraft mod in under an hour — as little as 20 minutes, depending on your internet connection.
In the video above, I show you how to write a basic Minecraft mod using TypeScript, and run it on your local computer with both a desktop and a mobile Minecraft server.
Below, I’ll walk you through the steps, with links to resources.
Prerequisites
You’ll need some software installed on your computer, to run the Minecraft server and the tools for writing your plugin. Install all of the four following:
- Docker — a containerisation solution.
- Node.js — a JavaScript execution engine and library.
- Portainer — a web-based GUI for managing Docker containers.
- Visual Studio Code — a code editor.
Minecraft Client
You need a Minecraft client to test your plugin.
Install at least one of the following:
- Minecraft Java Edition — a desktop client, if you want to test against a Bukkit server.
- Minecraft Pocket Edition — a mobile client, if you want to test against a Nukkit server (phone/tablet/Xbox). If you use this, you can use Minecraft Pocket Edition Bedrock Launcher to run the mobile client on your computer.
Installation
Now that you have the prerequisites installed, it is time to install the tools for the server and for plugin development.
Run the following command:
npm i -g smac yo generator-sma-plugin typescript
This will install four things on your computer:
smac— Scriptcraft Modular Architecture Controller, a program that runs Minecraft Servers for your plugins.yo— Yeoman, a scaffolding tool.generator-sma-plugin— a Yeoman plugin for generating a new Minecraft plugin using the Scriptcraft Modular Architecture.typescript— the TypeScript transpiler, for converting TypeScript code into ES5 JavaScript that can run in Minecraft.
Create a new plugin
Now that you have the toolset installed, create a new plugin by running this command:
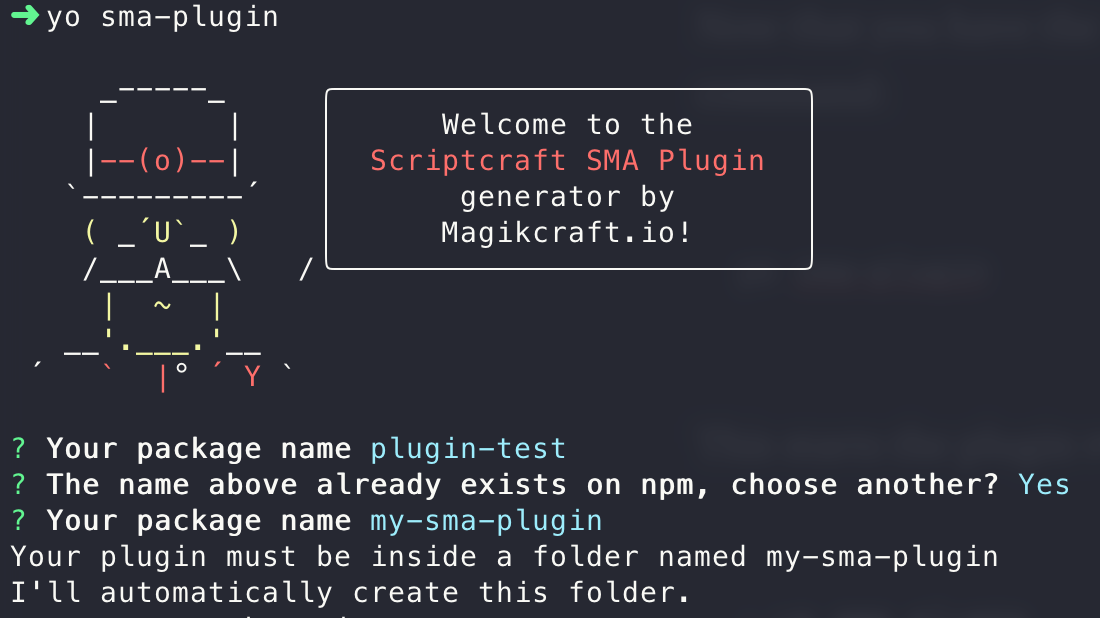
yo sma-plugin
This starts the plugin wizard:
➜ yo sma-plugin
     _-----_     ╭──────────────────────────╮
    |       |    │      Welcome to the      │
    |--(o)--|    │  Scriptcraft SMA Plugin  │
   `---------´   │       generator by       │
    ( _´U`_ )    │      Magikcraft.io!      │
    /___A___\   /╰──────────────────────────╯
     |  ~  |
   __'.___.'__
 ´   `  |° ´ Y `
? Your package name (workspace)
There is only one question you need to answer here — the name of your plugin. The wizard will create a new folder with the name of the plugin, and place the files for the new plugin in it.
This screencast shows you the process.
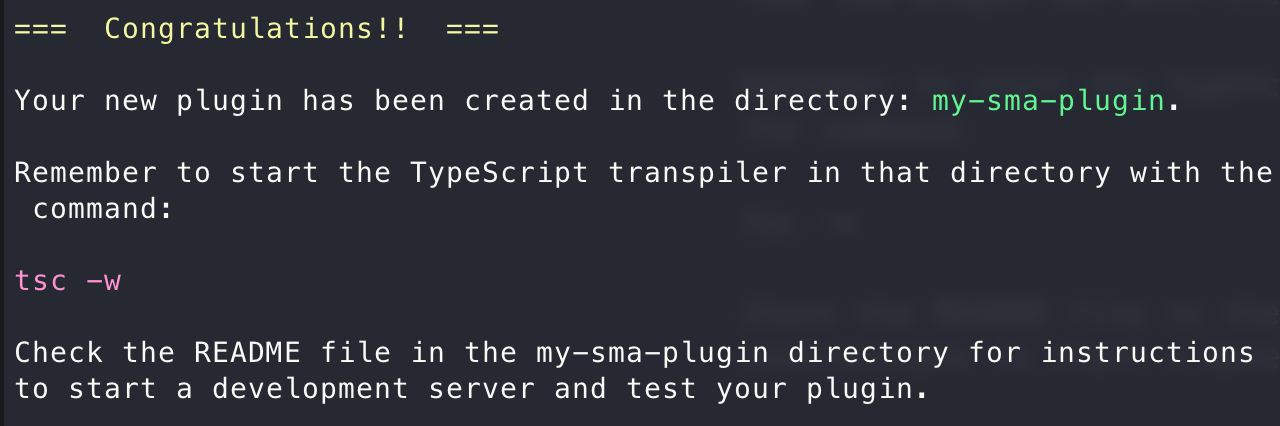
Once the wizard completes, it emits a message similar to this (I chose the name my-sma-plugin in this example):
Edit your new plugin
Start Visual Studio Code and open the directory containing your new plugin.

Here is a description of the files in your new plugin:
__tests__— a directory containing unit tests for your plugin. These are run with Jasmine. Add more tests in here as you develop your plugin..vscode— settings for Visual Studio code.autoload— any files in here are automatically executed when your plugin is enabled in the Minecraft server. Use this for initialisation tasks, registering event handlers, and so forth.lib— A place for you to put files that should not be automatically loaded (or that are required from your autoloaded files). If your plugin provides functionality to other plugins, then you export that via lib/index.ts.node_modules— modules from npm are installed here. You cannot use modules from npm that use V8 APIs (like fs or http). Many of the features that you need are provided by the Scriptcraft API and by the @magikcraft/core package..editorconfig— settings for the editor..gitattributes— settings for git..gitignore— files to ignore for git..prettierrc— settings for code formatting.package-lock.json—versions of installed dependencies. package.json —configuration for this plugin, including dependencies and scripts.README.md— instructions for developing and testing your plugin.smac-nukkit.json— a configuration for running a Nukkit server with your plugin loaded.smac.json— a configuration for running a Bukkit server with your plugin loaded.tsconfig.json— the TypeScript configuration for transpiling your plugin to JavaScript.
Open autoload/index.ts:
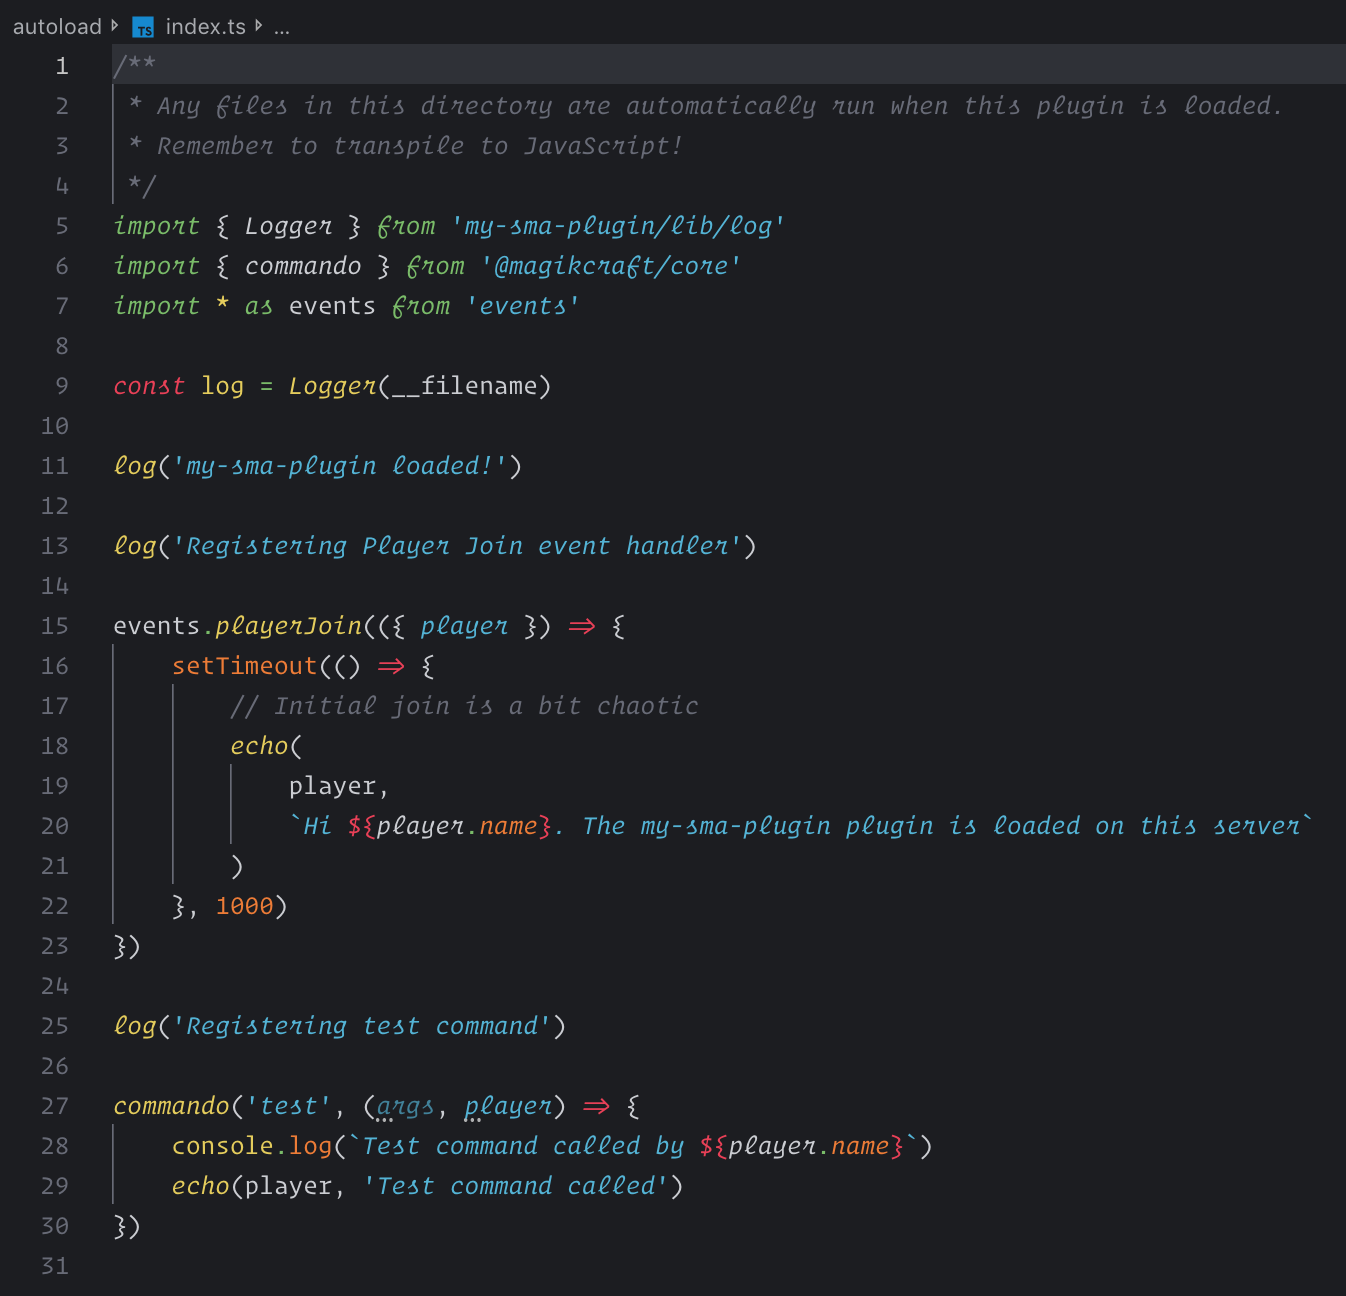
This file is automatically executed when the plugin is loaded. Changes that you make here will be visible when you (re)load the plugin.
Start a development server
You can load your plugin in a development server. There are two servers that you can use — one for the desktop Java client, and the other for the mobile Pocket Edition client.
Start the desktop server
Run this to start a desktop server:
npm run start:bukkit
This will:
- Pull the Bukkit server image from Docker Hub.
- Start the Bukkit server with your plugin loaded.
- Start the TypeScript transpiler to transpile your code to ES5.
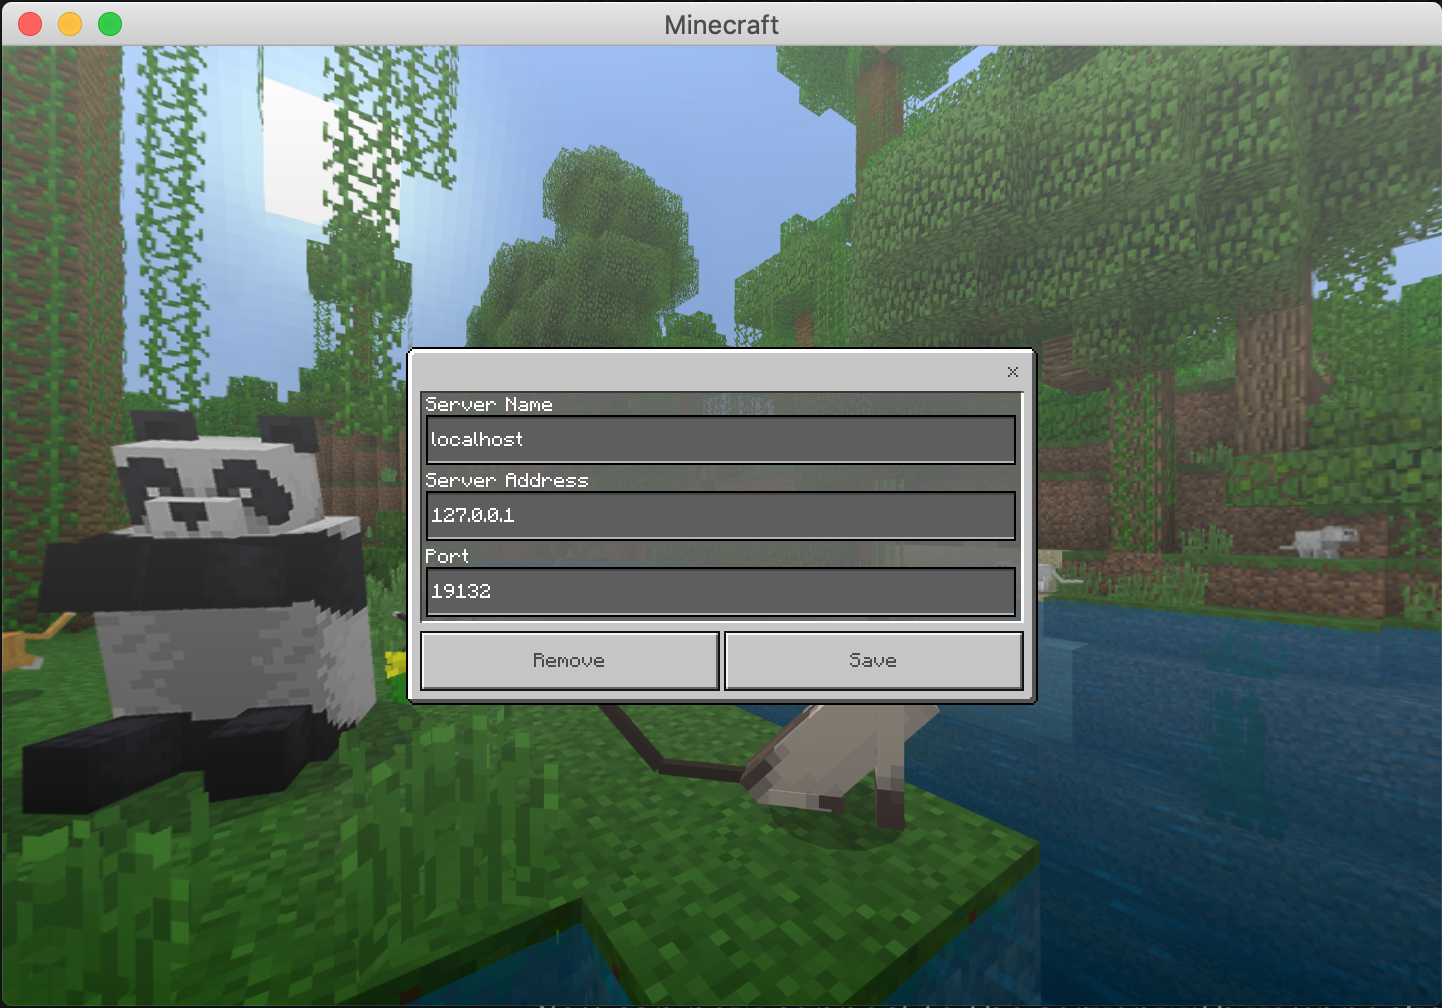
You can now connect to the server with your desktop client. Click on Multiplayer then Direct Connect, then use the server address 127.0.0.1:

Start the mobile server
Run this command to start a mobile server:
npm run start:nukkit
This will:
- Pull the Nukkit server image from Docker Hub.
- Start the Nukkit server with your plugin loaded.
- Start the TypeScript transpiler to transpile your code to ES5.
You can now connect to the server with your pocket edition client. Click on Play then Servers, then add a server with the address 127.0.0.1:
Reload changes to your plugin
As you change your plugin and save the changed TypeScript, it will automatically be transpiled to JavaScript.
To reload the changes in the development server, type the following in the server console:
ts on
refresh()
See the screencast below to see what this looks like.
Stop the server
To stop the server, type this command at the server console:
smac stop
See the screencast below to see what it looks like when you run this command.
Screencast: Start, Reload, and Stop
This screencast shows you starting the desktop server, reloading the plugin code, and also stopping the development server.